How to Color Coloring Pages Using Paint Shop Pro 7
Coloring Page From a Photo
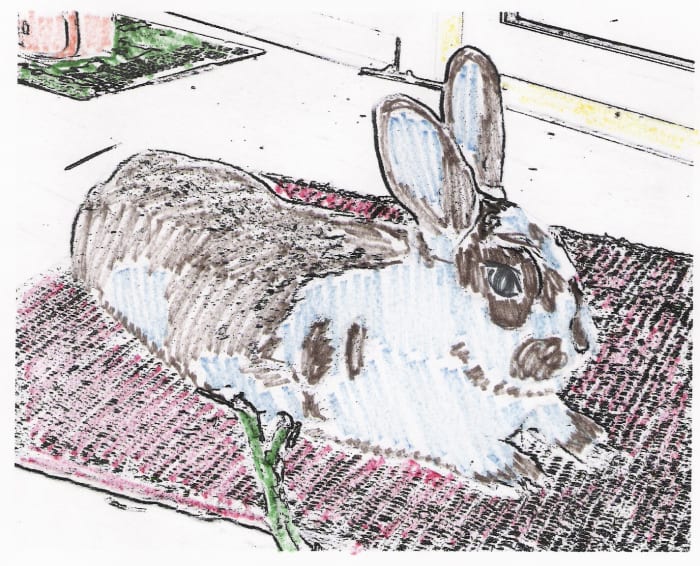
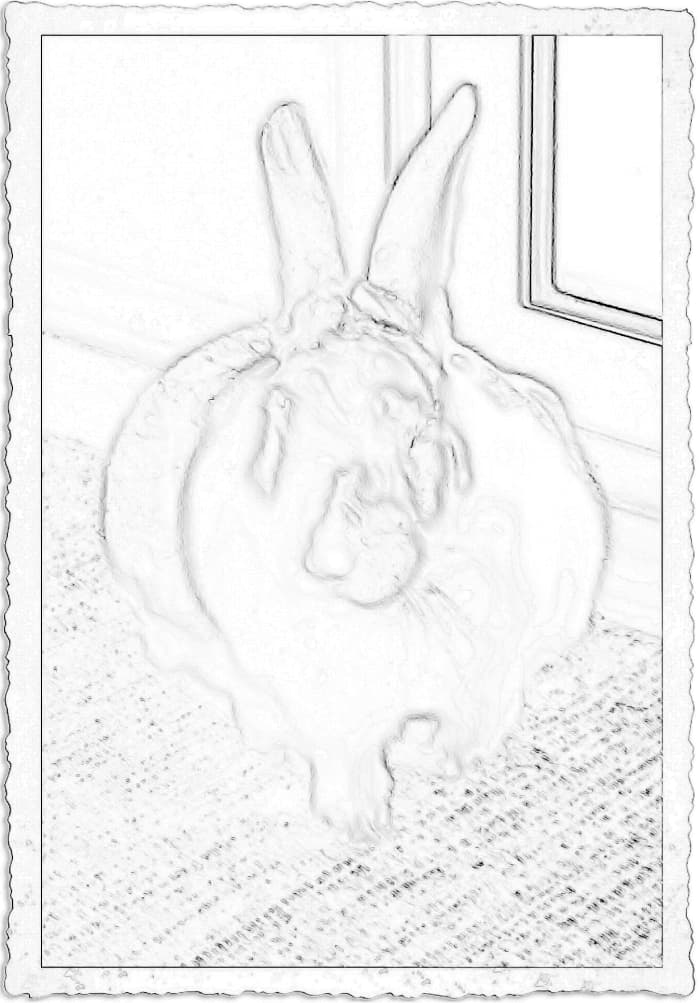
A coloring page made from a photo
Prokidwriter
Make a Coloring Page From a Photo
It's easy to use Corel Paint Shop Pro Photo X2 to make a coloring page from a digital photo! You can make one coloring page or enough to create your own personalized coloring book. Custom coloring books make great gifts for special kids or even for adults who occasionally feel the urge to color and be creative. To make your own coloring pages, here are the simple steps to follow:
Select Clear Digital Photos
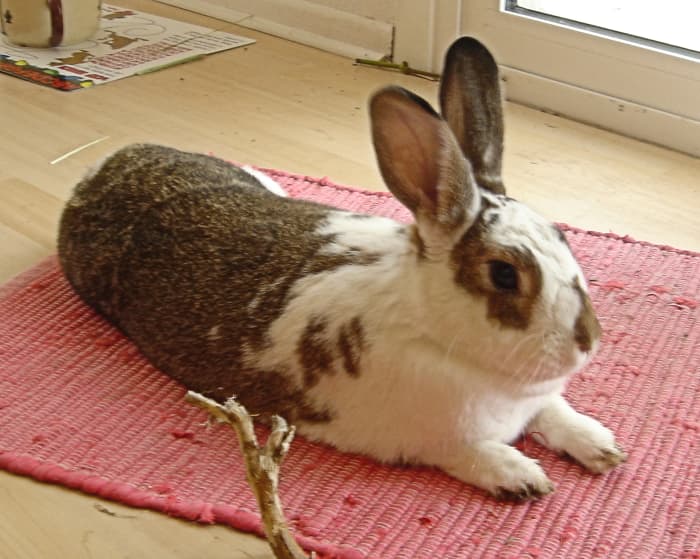
Select clear digital photos. This might be better without the red mat, but it does add interest.
Prokidwriter
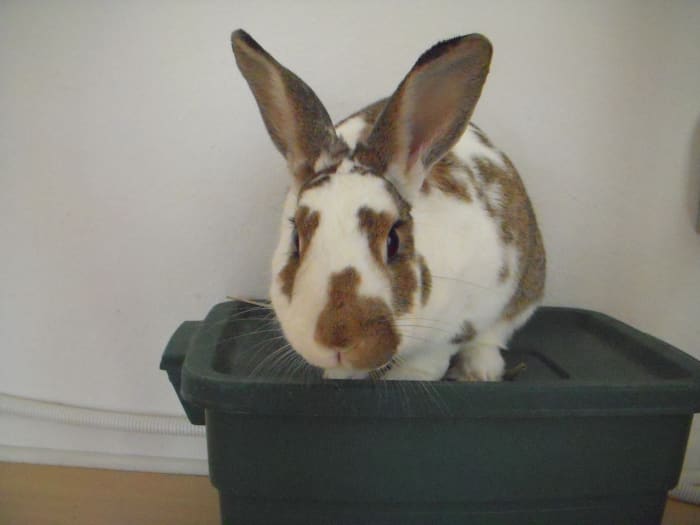
This photo should work well. The subject is clear and against a plain background. Some detail on the green box will be lost, but that's okay.
Prokidwriter
Open Photo In Paint Shop Pro
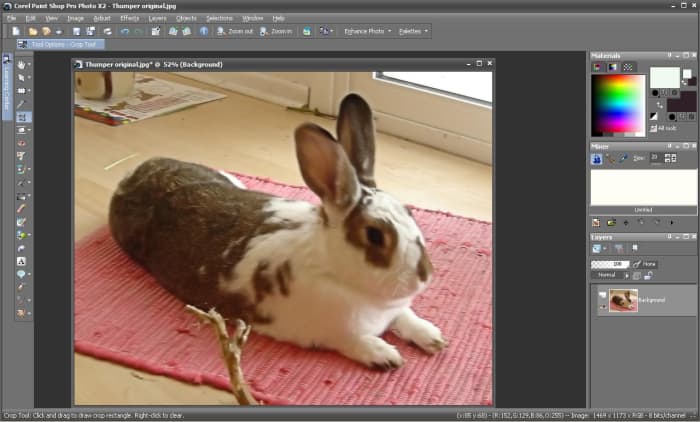
Photo in Paint Shop Pro, ready to turn into a coloring page.
Prokidwriter
Step 1: Select Clear Digital Photos
For best results, select photos where the subject is well-focused in the foreground, and the background is plain. Too much information in the background can cause a messy-looking coloring page, but feel free to experiment. Be aware that the software will look for edges when creating the coloring page, so a photo that is very dark all over may not render very well, like night shots. Well-lit photos with good contrast work best.
Once you've selected a starting photo to use, open it in the Corel Paint Shop Pro application.
Digital Camera Noise Filter
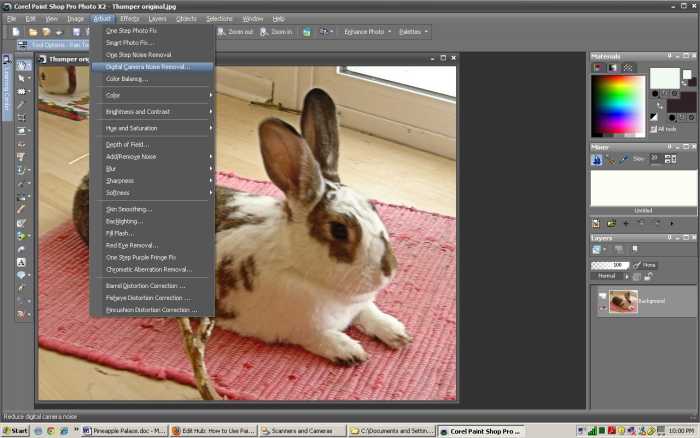
The digital camera noise removal option is located under the Adust menu.
Prokidwriter
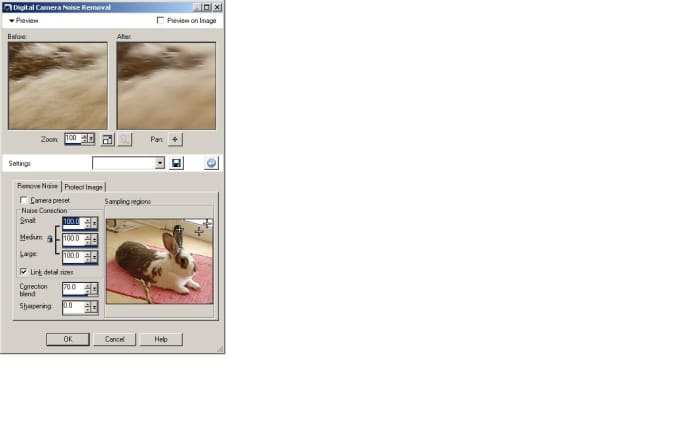
The Digital Camera Noise Removal dialog box.
Prokidwriter
Step 2: Select Digital Camera Noise Removal Menu Option
If your photo is grainy, or has lots of noise, you can smooth it out by using the Digital Camera Noise Removal filter. I've found that this step is rarely needed to make coloring pages, provided that you use good, clear photos to begin with, but if you need to remove noise, follow this step. Otherwise, proceed to Step 3.
Select the Adjust > Digital Camera Noise Removal option, which will bring up the Digital Camera Noise Removal dialog box.
In this dialog box, select the Remove Noise tab.Within this tab, enter the following values:
- Noise Correction Small: 100
- Noise Correction Medium: 100
- Noise Correction Large: 100
- Correction Blend: 70
- Sharpening: 0
- Check the box next to Link Detail Sizes.
Select OK to execute the filter.
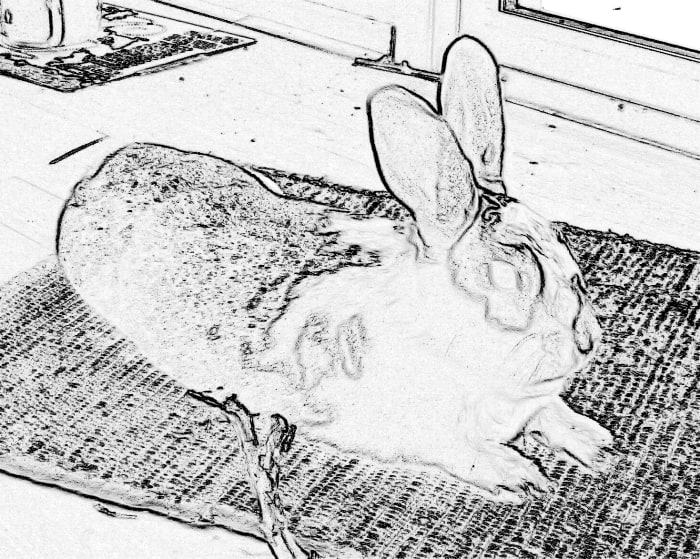
Find Edges
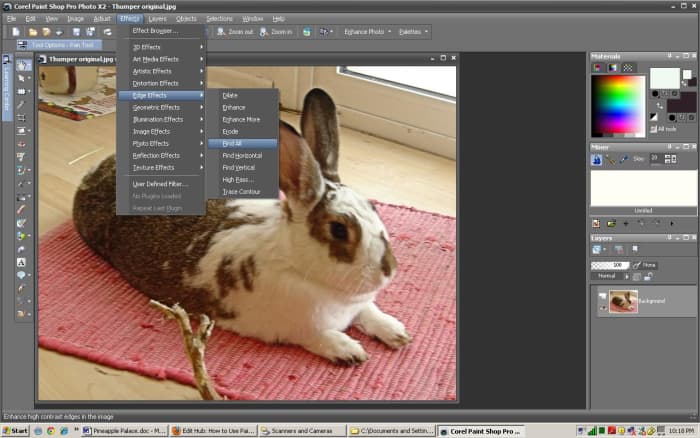
Edge Effects menu. Select "find all" to find all the edges in the photo.
Prokidwriter
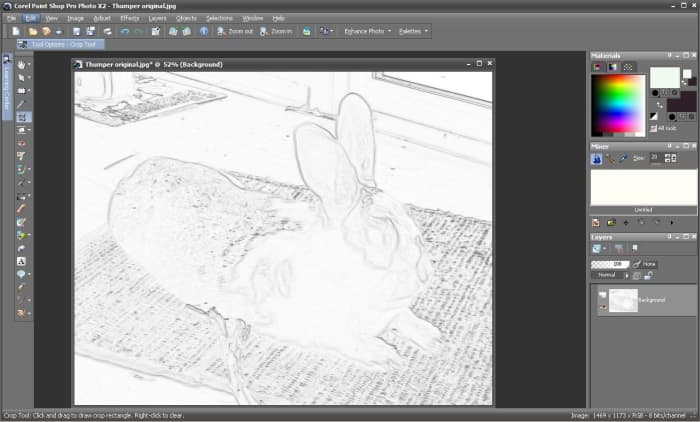
After finding edges in photo. Note how light the lines are.
Prokidwriter
Step 3: Find Edges in Photo
Select the menu option Edge Effects > Find All
This will result in filtering out most of the photo, except for edges. Note that the picture that results may have very light or faint lines. At this point, you can either save this result, or you can take the additional step to darken the lines.
Enhance Lines
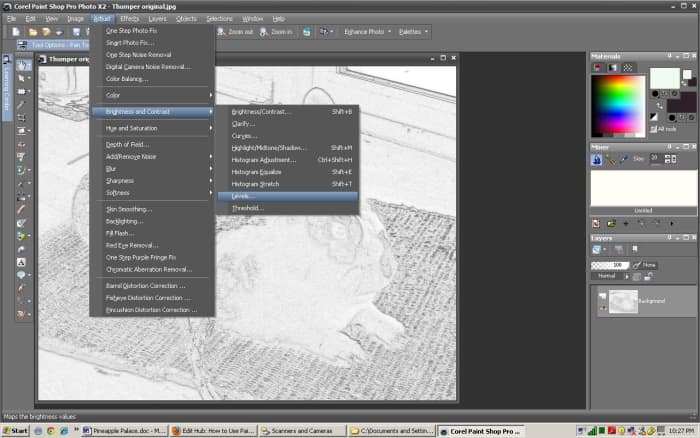
Enhand the lines by selecting Brightness and Contrast Levels
Prokidwriter
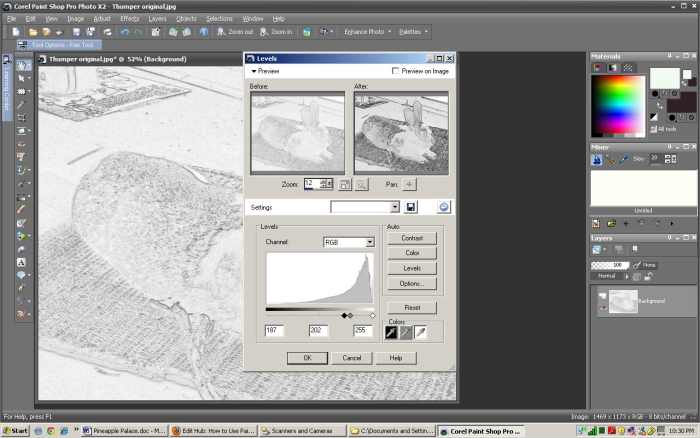
Levels dialog box.
Prokidwriter
Step 4: Enhance Lines
Enhance the lines to your preference by using the following method:
Select the menu option Adjust > Brightness and Contrast > Levels
This brings up the Levels Dialog box.
In the Levels Dialog Box, select RGB from the Channels drop-down menu.
Adjust the black, grey and white values by doing the following:
- Make the white pixels whiter by sliding the white diamond slider to the right.
- Make the black pixels darker by sliding the black diamond slider to the right.
- Adjust grey pixels by moving the gray diamond slider to the right (lighter) or left (darker.)
Note that the values of the pixels will display in the boxes below the diamond slider.
Coloring Pages Created with Corel Paint Shop Pro
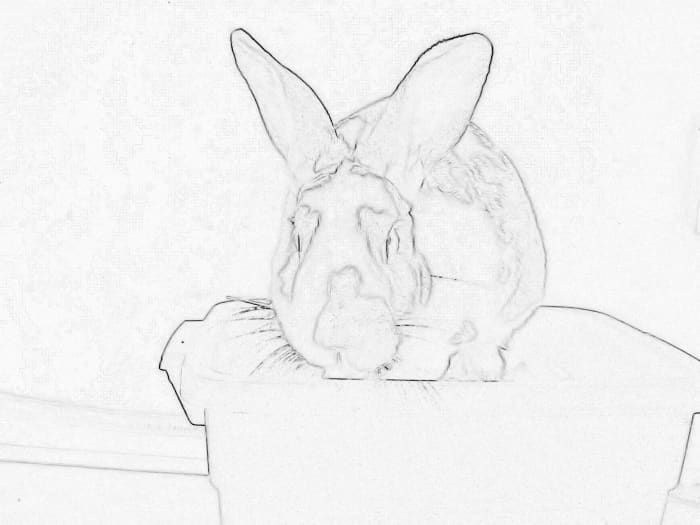
Coloring page created with Paint Shop Pro.
Prokidwriter
Coloring page created with Paint Shop Pro
Prokidwriter
Coloring page created with Paint Shop Pro. Original photo was black and white.
Prokidwriter
Custom Touches
- Adding text is a nice option for a custom touch. It's also a way to get an educational edge into a fun activity. In Paint Shop Pro, select the Text tool. Select Font > Highlight LET , which is a good option for a letter style that can be colored in. Feel free to experiment with different fonts and font sizes.
- Try printing coloring pages onto different paper types. Drawing paper cut to 8.5" x 11" size so that it fits into a standard printer try makes an interesting choice, or try pastel or charcoal paper with a rough surface.
- Children's book authors - try making a coloring page from one of your book illustrations! It's a fun craft activity for school visits.
- Make a coloring collage by piecing several coloring page images together and printing them on a single large format paper. This makes a terrific rainy-day activity, and two children can color one large page at the same time.
Experiment with the different creative possibilities that coloring pages offer!
Adding Text to Coloring Page
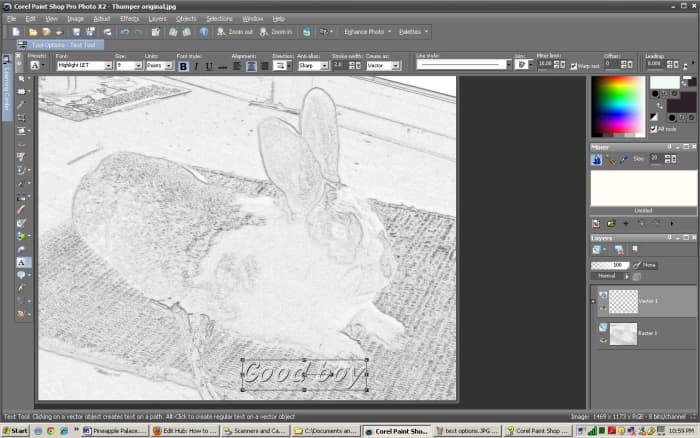
Text tool can be used to add text to coloring page.
Prokidwriter
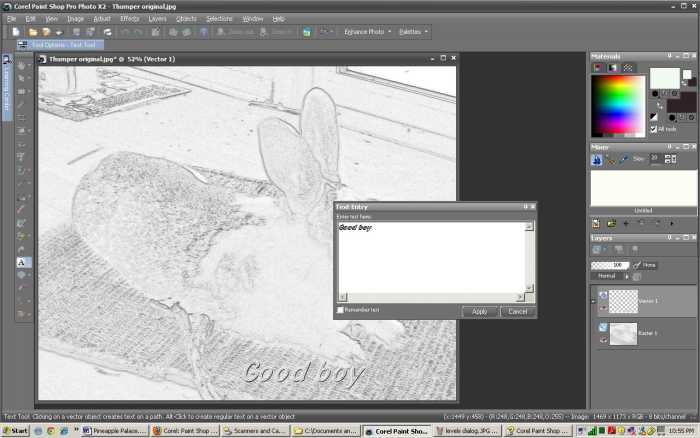
Text entry box.
Prokidwriter
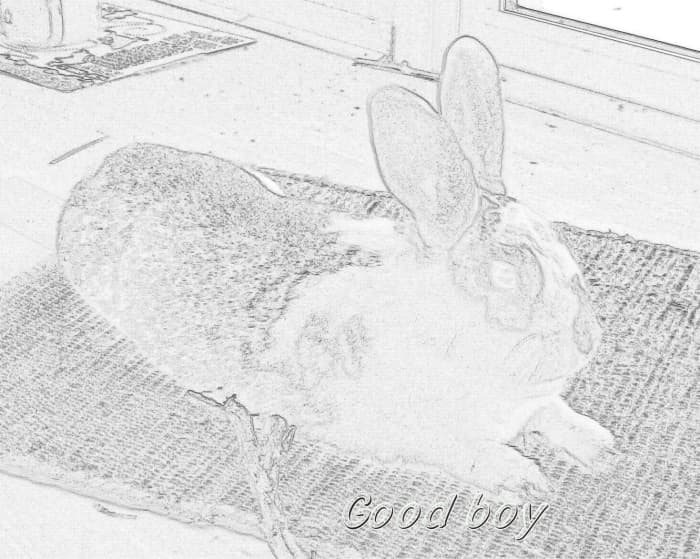
Coloring page with text
Prokidwriter
Andrew from Rep Boston MA on July 13, 2014:
Very nice idea on how to make coloring pages!
Thanks for the hub,
~thranax~
hubber on December 17, 2013:
I've stumbled across colorbookit.com, too, which seems to help with custom coloring books for those of us who aren't as computer literate :)
https://www.colorbookit.com/
KA Hanna (author) from America's Finest City on February 18, 2013:
Thanks SunkistGirl! You can play with the settings, too, to get more or less detail on the coloring pages you make!
Ann Pingrey-Korthas from Utah, United States on February 18, 2013:
I'm excited to try this!! We go through coloring books quickly and I'm always looking for new ways to keep color pages around. THIS is a fabulous idea!! I do photography as a hobby so now I can use all my shoots as color pages!! Thank you for sharing.
L.L. Woodard from Oklahoma City on February 11, 2013:
What an amazing way to make custom coloring pages. I can see kids enjoying coloring photos of items of special interest to them. Thanks for sharing the steps to make this process work.
Great hub; voted up and Shared.
KA Hanna (author) from America's Finest City on January 27, 2013:
Thanks Dreamhowl!
Jessica Peri from United States on January 27, 2013:
I remember using Photoshop in college to create a similar effect with photos for an apocalypse project. You spell out the process really well, and I love the picture you chose. Voted up!
How to Color Coloring Pages Using Paint Shop Pro 7
Source: https://discover.hubpages.com/art/How-to-Use-Paint-Shop-Pro-to-Make-Coloring-Book-Pages-With-Photos
0 Response to "How to Color Coloring Pages Using Paint Shop Pro 7"
Post a Comment